My first class was spent learning many of the basics I just shared with you. After a general overview and a brief history we began with the preparation - the technique of mixing plaster. 2 parts sand to 1 part lime calcium. Easy..... or not so much. After several failed attempts to mix a plaster that didn't crack after 3 minutes it became apparent to me that measuring and mixing plaster is lot like how my mother measures and mixes when baking. 2 parts sand to 1 part lime calcium really means: a 'bunch' of lime smooshed up, then some sand poured straight from the bag, then a smidge or two of marble dust for lustre followed by a dollop of course sand, stirred and then do the 'spoon test' - (very similar to my grandmother's test to see if the jelly will set or not) Does it stick to the spoon? Or slide off slowly with a sploosh or a plop? Once I started looking at the plaster like a homemade batch of muffins things improved.
On day two I came in excited to start painting. "Lets do a small landscape to start" suggests my teacher. Excellent idea I agree. A lovely Tuscan countryside with rolling green hills, bright blue sky, puffy white clouds and a little cottage or country villa...I love the idea. We get out the natural earth pigments to begin True Fresco. Well... talk about bursting my bubble before we even start! There's brown, light brown, dark brown, red brown, blacky brown, browny green, yellow ochre (browny yellow), lighter reddish brown and tan. I admit I had a real moment of "what the F*&%!" There's not even a brilliant white to mix with these. I looked at my teacher with a 'what am I supposed to do with this look' She laughed.
So really there are two things that will make a Fresco painting seem bright and really 'pop'. One is using secco colours at the end, the blues, golds and bright reds but to really work in the buon fresco technique these colours are not part of the pallet. The other thing you can do is have a really good drawing, isolating the light and dark, controlling the values...gee there it is again, the basics of art. Just like in my first painting course here. It's all about shape, light and dark. It could be all in black and white and still seem bright if you get the drawing right. Ok I get it, bring on the browns! Oh and there is a 3rd thing that can help. There are in fact some brilliant whites that can be used one made from lead, the other made from zinc and a bright pink/red colour called cinnabar. Of course all of these colours will fry your brain and mess with your central nervous system but heck do they ever do wonders for a painting! There's a reason artist have received reputations for being flighty, outrageous and downright weird. Most of us are, but often it's not a personality trait...to many toxins.
Now that I can mix the plaster and prep the colours the process begins. Each day I do a "giornata" a small section that I can finish in one sitting. I start by mixing and laying a small area of plaster. Then I transfer a section of my image onto the damp plaster using a stencil I made earlier of the design. Then I paint it in a beautiful collection of browns. I have been working on areas approximately 6"x6" during a 3 hour period. Once I am pleased with what I have done or the plaster is too dry I cut off any excess plaster. The next day I will apply more plaster ensuring it is level with the previous layers, line up the stencil and dust little bits of pigment through the holes poked in the stencil. Then I will attempt to match the colours from the previous day and keep going. There is no going back to fix things once it is done for the day. Once the plaster dries the colours are permanent, you can not wash off or add to them to make changes. At first this was terrifying...now I find it liberating. No use stressing over something you can't change, might as well stay focused on the current section. It really forces you to let go of things and just get on with it!
I have had the chance to visit some great Frescos by great masters such as Giotto and Agnolo Gaddi with my teacher as a guide. It is inspiring and looking at these paintings I can see that these painters certainly have been able to create bold, bright moving images using buon fresco. So since getting over my own colour delusion I have come to really love fresco. It is such an eclectic mix of skills rolled into one process. Part painter, part baker, part construction worker, part chemist and part alchemist. I may yet be able to turn led into gold or at least turn a concoction of sand and a whole lot of brown minerals into something stunning!

First day, trying to make a plaster that wouldn't crack!

Beginning the process, preparing to paint two faces.

End of the day, two faces done, excess plaster has been removed.

My teacher Giulia helps me to apply the spolvero (the stencil pattern)

Last face stencilled in and ready to start.

I receive pointers from the pro. My teach Giulia.

Painting the base colours with verdaccio just one of the many 'browns' we use!

Kai comes to school with me one day and creates a fresco of his own!
He finishes in one day, little speed painter. (using the non-toxic colours of course)

Visiting Santa Croce church to see the real deal. These Fresco do not look brown and dull.
It can be done, I am inspired!
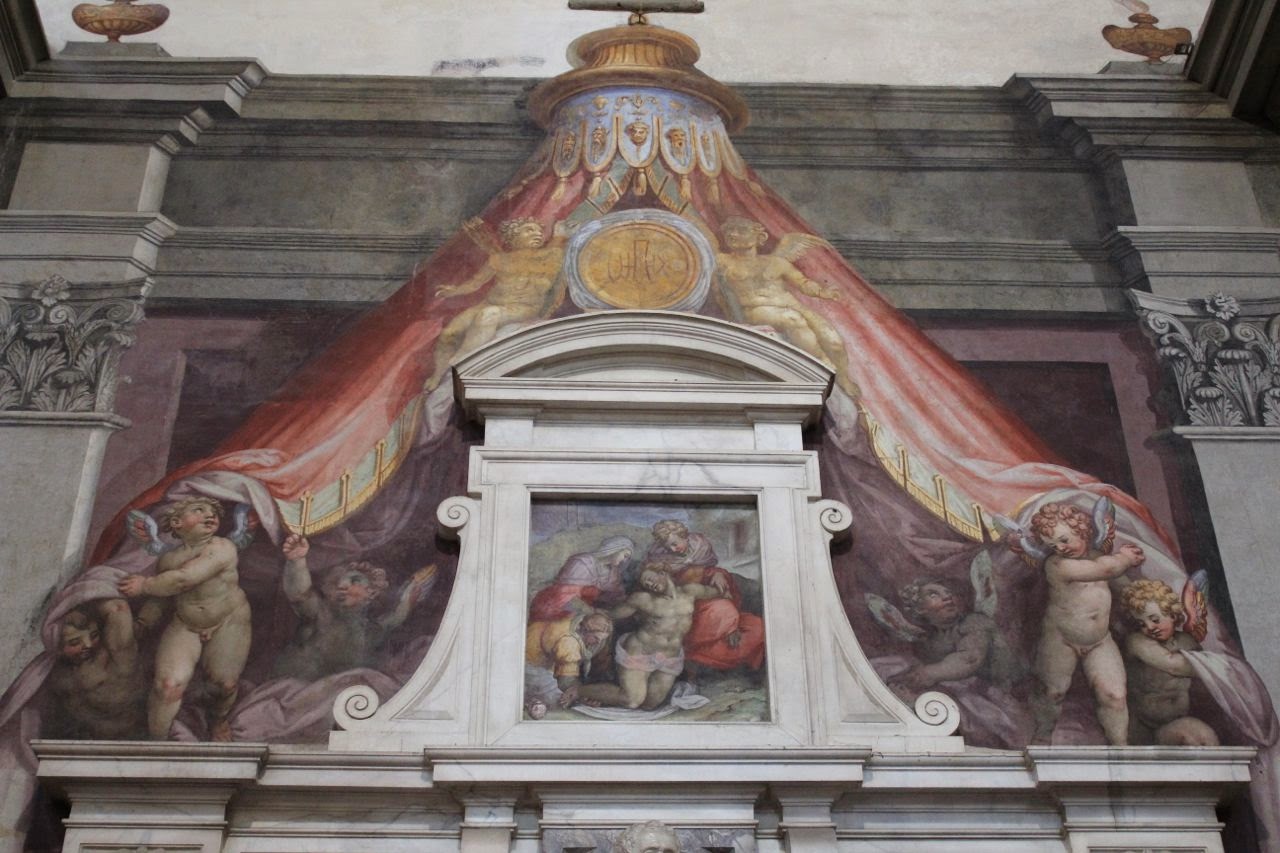
This Fresco was painted by a friend of Michelangelo and adorns the top of his tomb.
Apparently this reddish purple is a pigment that can be used in buon fresco!
It is now my personal mission in life to find this colour before leaving Florence. Some pigments are harder to come by than others!

No comments:
Post a Comment